"Self-sufficiency does not mean 'going back' to the acceptance of a lower standard of living. On the contrary, it is the striving for a higher standard of living, for food that is organically grown and good, for the good life in pleasant surroundings... and for the satisfaction that comes from doing difficult and intricate jobs well and successfully." John Seymour ~ Self Sufficiency 2003

Friday, 8 October 2010

Nasturtiums - an edible plant

I love nasturtiums.

I love the way the plant hangs and drapes itself in my garden, providing shade to the soil below, and assisting in the prevention of weeds.
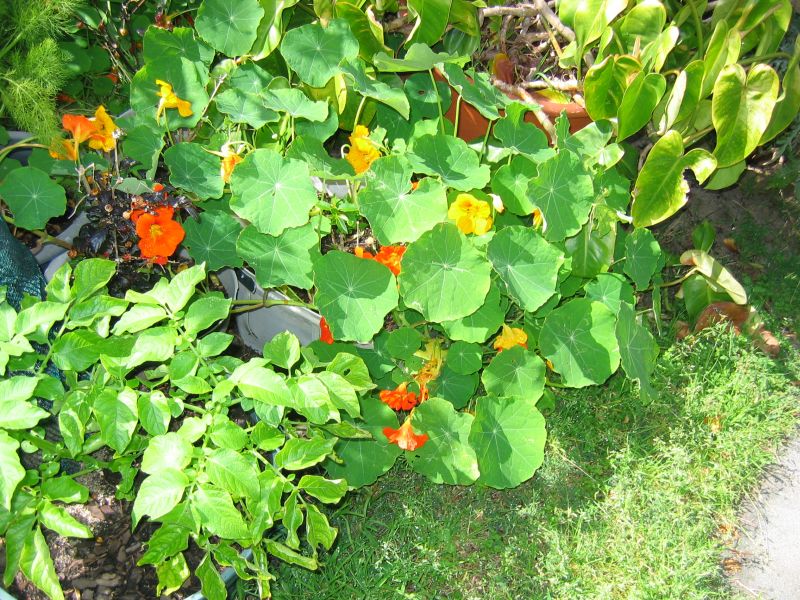


Not only is the plant itself pretty, but it has various culinary uses too.

I have mixed the flowers in with my salad (please read the info / warnings on edible flowers here) and have been rewarded with a delicious peppery taste, and I have been told (although  haven't tried it yet) that one can use the seeds in place of capers, and, according to James Wong (Grow your own Drugs ISBN 978-1-60652-107-6 page 208), one can can also use the flowers and leaves, which have antimicrobial properties, to treat bronchitis, catarrh and upper respiratory tract infections.


A nasturtium seed just waiting to be harvested

According to Edible and Medicinal flowers by Margaret Roberts (page 56)nasturtiums are high in Vit C and are a natural antibiotic.


But, I thought today I would make some nasturtium capers and this is a recipe I found online (http://www.herbalgardens.com/archives/articles-archive/nasturtiums.html)

Pickled Nasturtium Seeds

Use green nasturtium seeds, and in picking retain a short length of stem on each. Lay the seeds in cold salted water for two days (two tablespoons salt to one quart water), then place them in cold water for another day. Drain and rinse well and place the seeds in a glass jar, cover with vinegar heated to boiling point, and close the jar tightly. In a few days the seeds will be ready to use. They are an excellent substitute for capers.

Nasturtiums - graceful, edible and beautiful
230gms of Nasturtium seeds harvested from my garden in just 10 minutes


Separate the clusters of seeds, if they occur, and then remove the stalks and remaining bits of flowers from the seeds and wash well to remove any sand or insects.

They can occur as single seeds, double or triple seeds. Pull off the stalks, separate and rinse.

Then I dissolved 1 tablespoon of salt into 500mls water (1 US quart = 0.946352946 litres and I'm doing 1/2 the quantity) and I added the seeds.

This is being allowed to stand for 2 days before rinsing - after which I will leave them in plain water for the last day.  I will boil the vinegar (enough to cover the seeds) and pour it onto rinsed seeds in two separate small sealable bottles.

Even though they are being preserved in vinegar, I will definitely store one the "nasturtium capers" in the fridge.  The other one will (possibly) be sacrificed to science / my preserving curiosity - I want to see how long it will last in my pantry cupboard.
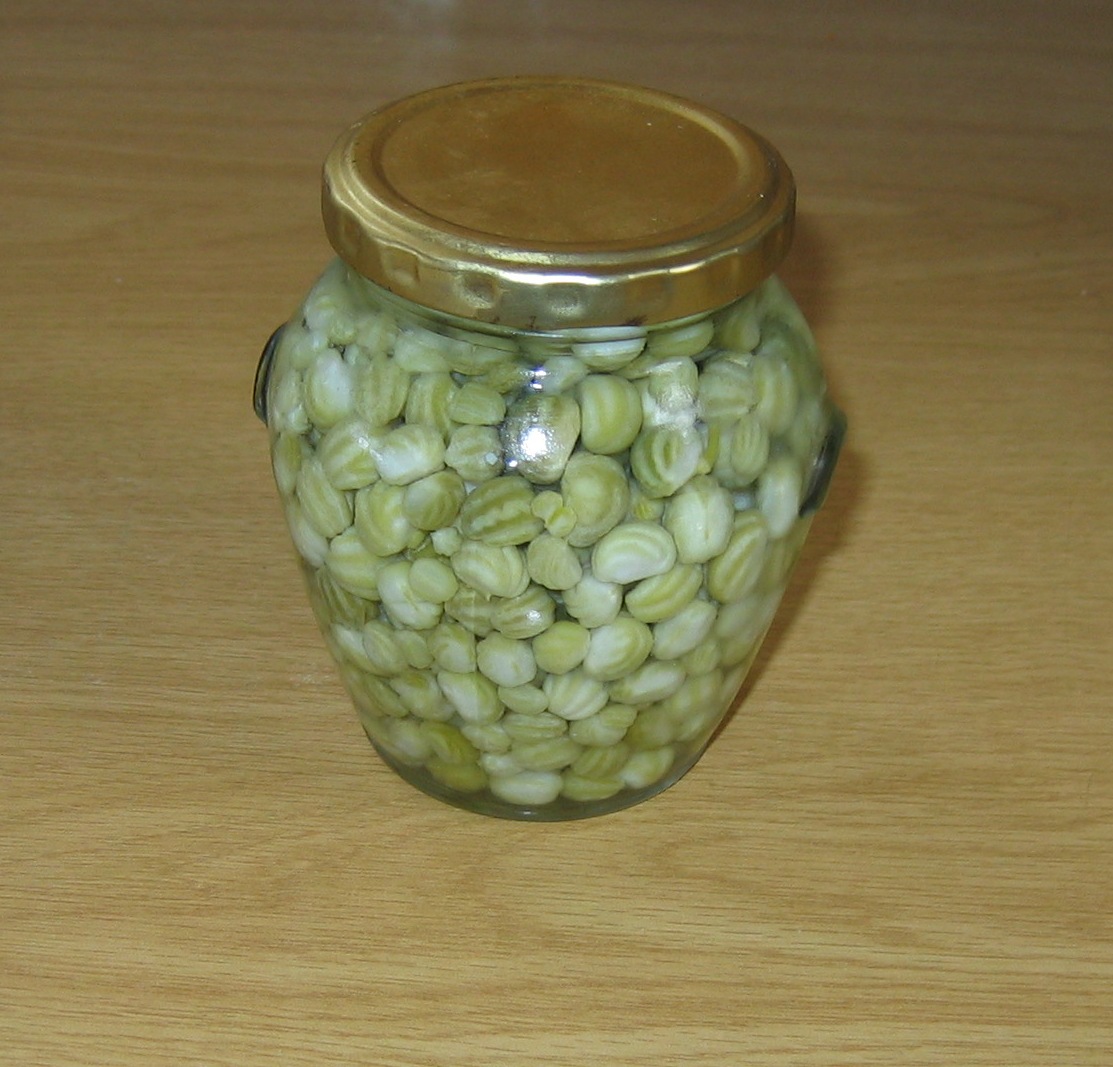
Pickled Nasturtium capers

They can be used in sauces, dips, casseroles, soups, stews and as edible decorations.   For more recipes using capers go to: Home cooking

In addition I also get beautiful flowers and colour for my house - free from my garden

Monday, 4 October 2010

Bird bath or shower?

I was cleaning the family’s muddy footprints off the kitchen floor after a rain shower last week when I happened to glance out of the window.

There, standing in the gentle drizzle and in the middle of a puddle of water, stood a Cape Rock Pigeon. I say stood, but it was actually squatting in the puddle. As I watched it, it suddenly raised one wing and held it aloft for approximately 30 – 60 seconds.


I was dumbfounded – wondering what the pigeon was doing. Had it hurt is wing?  How was I going to catch it to take it to the Bird Park?  What if, in so doing, I hurt it's wing further?

As I continued to gaze at it, hesitating, Lo! and Behold! it raised the other wing.


The pigeon continued to lift alternate wings for about 10 minutes until it proceeded to finally have a bird bath in the puddle with much splashing and flapping of wings.

Finally finished, it walked out of the puddle and preened itself before flying off to the nearest tree.


The question remains - is this a modern pigeon who prefers to take a shower to a bath – or has the pigeon been watching too many humans taking an outside shower au naturel?

Sunday, 3 October 2010

Beetroot

I am in love!

I just adore the beetroot plant.


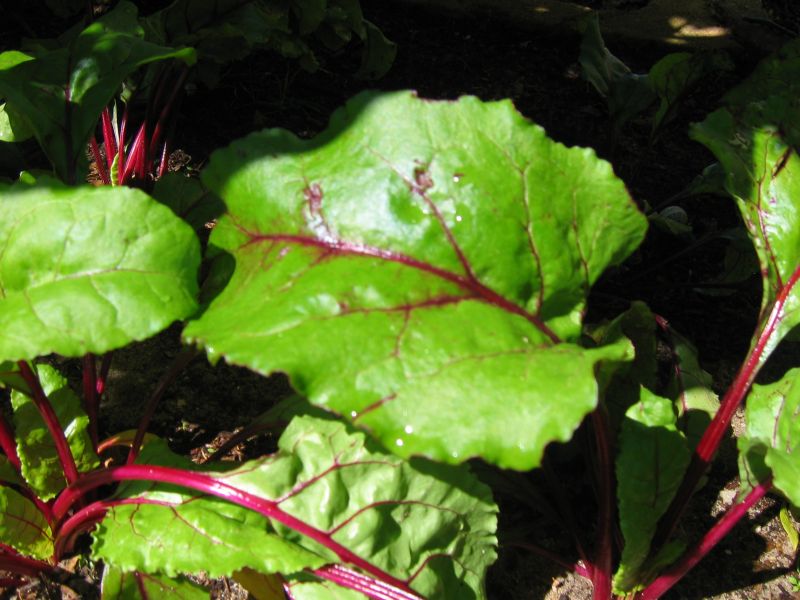
It is exquisite to look at, the leaves and root are both edible and it is delicious cold, hot or pickled - whole, sliced, cubed or cut into julienne strips.  And it provides sodium, phosphorus, calcium and small amounts of Vitamin A and C.  It is also low in calories - containing only 44 cal (189 kj) / 100 gms (Versatile Vegetables ISBN 0706420659 page 42)

The beetroot leaf with it's delicate red veins reminds me of the capillary system in the human body
There are so many exquisitely beautiful vegetable plants that I have decided that I will NOT be planting any more flowering plants that are not edible or useful - lavender, roses, marigold and nasturtiums will be the only exceptions:

 lavender for it use as a cupboard, room fragrance or for use in soaps and as a pest deterrent;

 roses will be planted at the end of our grape vine rows on the farm - also as a pest deterrent;

 marigolds will be planted near my tomatoes;

 and

 nasturtiums will be there for all those pesky worms to much on, and whatever flowers I can harvest, I will put in our salads.

In the permaculture way, giving a portion of one's garden / harvest to the insects continues the cycle - if I have enough of anything, a portion of it will be left exposed for the insects to feed on.

Giving back without taking away - or paying it forward.

Saturday, 2 October 2010

Satisfaction

We've had family visiting from up country for the past 10 days.  Last weekend we managed to get way to the farm for 4 days, much to the delight of our grandson.  He was facinated with the Dover stove and kept himself busy (with constant adult supervision, naturally) topping up the wood, as well as preparing and lighting our evening braai (barbecue).

We lit the Dover stove in the evenings when it turned chilly, and the one evening after our meal, we all sat around it, with our daughter reading to our grandson from the Jungle Book by candle light / parrafin lamp.  There was no TV, no radio, just the crackle of the wood burning in the stove and the wind rushing through the trees outside.  And the gentle light provided by the candles / lamps.  Very snug we were.

It was such a perfect evening, with our entertainment being provided, as it was in days of yore, through the reading of a book.  Each time my daughter stopped for a moment, our grandson said, "Please carry on, Mom".  What more reward could a storyteller receive than that?  And my grandson has discovered that an evening can be enjoyed without the necessity of a modern convenience - the dreaded television.

Days, too, were filled with being outdoors - even if the wind was howling and the temperature wasn't that comfortable - another jersey soon sorted that out!

And I realised that our dream is within reach. In fact, not only is it within reach, but it is rapidly coming to fruition.

What we are trying to do is let the next generation (or two) experience a different kind of life - one that is different from what their everyday lives consist of, and to realise that this other side of life really is OK - especially in this world filled with rush, stress, noise / light and industrial pollution, and the latest gadgets / modern conveniences.

In fact, not only is visiting the farm OK in their book, but they all want to visit and are loathe to leave.

And that is a place where there are few creature comforts - just the bare necessities.

I love it when a plan comes together :-)


All too soon, though, work called us back to town.

But that gave me the opportunity of keeping my eye on all my seedlings which are all peeping above ground.

We have already got a bunch of grapes forming on the grape vine...


My beetroot is coming along very nicely - I had to give it a shadecloth fence - firstly, it was too hot a spot, and secondly, our dog kept digging them up.


And my tomatoes in the east facing retainer blocks, together with the sweetcorn to the right and the little lemon trees I've grown from seed at the top of the photo...


More tomatoes and parsley in the west facing retainer wall - catching their last sun rays for the day...

Capsicum - grown from seeds which I saved when we used one in a salad ...


And, finally, a (slightly) raised veggie patch tunnel, with shadecloth, to protect it from the snails, insects and the south easter, which blows a gale here in summer.  I have seedling trays in the bed with broccoli, turnips, cauliflower and cabbage all sown in empty loo roll holders...


It looks rickety, but it works, and the wind hasn't managed to blow it over ...yet!
There are also peas, baby spinach, onions, lettuce, chives and rocket which we've been munching on for a few weeks.  And, hopefully, the plants above will provide a good harvest in the months to come :-)

Tuesday, 14 September 2010

Moonlight starbright

As I was closing the curtains on Saturday night I saw this just peeping above the tree tops...


Apparently, it is Venus and the crescent Moon and they are shining through the twilight in beautiful conjunction, less than 10° apart (http://mybroadband.co.za/vb/showthread.php/266671-Go-out-and-look-at-the-moon-right-now!)


A crystal clear night sky - with a view forever.  I hope I never take that for granted.

Sunday, 12 September 2010

An Eco-friendly meal?

We had friends round for dinner last night, and, as always, I had to figure out what to serve that wouldn't cost the earth in electricity - either in wattage used or in money.

I think I came up with a brilliant solution.

We had a fondue!


So how was it Eco-friendly...

In the afternoon I cleaned the copper fondue set using wood ash for our fireplace - dab a damp cloth into the wood ash, rub on the surface to be cleaned and watch the dirt disappear.  Then all it takes is a rinse under a running tap, and quick dry, and the copper looks amazing!  No dirty hands full of Brasso and no chemicals needed - if only I'd known this years ago...

Garden fresh salad
The salad came, in it's entirety, from my garden - four different types of lettuce, chives, onions, tomatoes - and the bean sprouts grew in my sprouter this week.

I made all the sauces, bar one - the pureed apple to go with the pork.  We don't have an apple tree - yet :-)

We also had tahini (a sesame seed sauce - perfect with the chicken), a chilli sauce (peppers, onions, garlic, chillies, dried apricots and honey - brown the onions and then add the rest of the ingredients and cook together until semi-mushy - to go with the pork chipolata's) a mushroom sauce, bbq sauce (the last two to go with the steak) and guacamole.


I had also made a salsa with red, yellow and orange peppers, apple, onion, courgettes and sweetcorn - mixed together with a dash of lemon juice and olive oil and salt and pepper.

Finally, I made a loaf of fresh Artisan bread.


It was delicious.

Otherwise, all the preparation - mixing, chopping and puree-ing was done by hand.

I am well pleased with the resulting power usage.

I used the oven to bake the bread - for half an hour - and the stove top to heat the oil.

And I was asked for my bread recipe.  I love that - for there is nothing better than sharing knowledge with whoever asks for it.

There is surely no nicer way to spend an evening than with friends, round the dinner table, with everybody cooking their own food, in their own time.  A fondue is such a "gemütlich" (warm, congenial and friendly) way to spend an evening. 

Wednesday, 8 September 2010

It's finally Spring time in Cape Town

The lovely warmer mornings, and days, in Cape Town compel one to get out into the garden and to start weeding, and tidying.  And planting...

So I did just that.

But, to keep RMan occupied because he is always fretting that he needs to get to the farm to do this or finish that, and we just can't just get up and go (this is the start of the business' busy time of year), I suggested that we re-do the tiles in our guest bathroom. They were pretty grotty Biggie Best tiles from the early 1980's.

The start of it all...
He liked the idea - so much so that he started removing them the next morning - a Sunday! (Hope our neighbours aren't too mad at the noise - we did wait until 10.30 a.m.) But with all things renovation-wise what starts out as a simple "we'll re-do the tiles" became a "we're re-doing the whole bathroom"! That meant removing all the wall tiles, and the floor tiles, the basin in it's pedastel cupboard (which was rotting underneath and at the back - chipboard!) and the bath - well, it was tiny, hardly ever used (only by my grandson when he comes to visit) and finally, baths are a waste of water! Who baths these days?

So, the renovation has been proceeding at every available spare moment - but I gained something from the stripping down of the bathroom which I have been able to recycle. Apart from the wall tiles, which are great for the base of all my pots which I plant up, the bath has become one of my veggie patches!  And a raised veggie patch at that :-)

The bricks are for me to sit on whilst I harvest the produce - making it easier on my back.  Also you can see the lettuces on the left growing in the two stainless steel bowls I mentioned in an earlier post.
And I went one step further - because the bath is situated in the one spot that gets sun all year round, and is very hot in summer (my lettuces tend to bolt at the first sign of upper 20's heat) I decided that I would fashion a shade over the bath. All it took was some old irrigation pipe secured to short rods in the ground and covered "tightly" with the shade netting - to prevent our pesky snails from having a nightly munch.


I have left the front of the shadecloth loose so that I can lift it up when I need to get inside - afterwards I secure it with an old dowl type rod / support.
In the bath I placed some some lettuce and chives seedlings which I purchased from a local nursery (for instant "growth"), and sowed carrots and celery in situ (with the aid of my Magic Seeder :-) ), as well as garlic and onions. My hubby is still trying to come to terms with a bath in our back garden, but as he is already eating the produce therefrom he can't really complain. I think (and hope) that it is not as disturbing to his eyes as it was when he first saw it?!


Once I started sowing and planting I couldn't stop.

We are located on a hillside and thus have retaining blocks in our garden. I had previously planted them up with flowering plants - but, hey, they get full sun in summer, so this year they are planted up with corn, dwarf beans, parsley and tomatoes. It took me ages to remove all the soil from each block and mix it with compost and organic pellets (mainly chicken manure from the smell of it) but it was necessary. It gave me time to think of exactly what I was going to plant. Nothing more thought provoking than a good dose of manual labour - all on my own - well, the hubby was (and still is) busy with the bathroom :-)


And to finish it off I cleaned out under some hibiscus trees and sowed some more carrot seeds and planted some turnip and rocket seedlings. I have to cordon off the area as it was a favourite summer afternoon snoozing area for our dog - perhaps that is why I had never thought of using it before?

More carrots to the left, beetroot and rocket
I have also sown broccoli, cabbage, cauliflower and turnip seeds in the empty loo roll holders I have been saving all winter - you'd be amazed how many loo roll holders one can save once you start. Sowing seeds in the holders allows one to transplant them straight into the ground when they are large enough, and once they are there they help prevent attack of the roots by cutworm, etc.

This last week I harvested 2kgs of sweet potatoes, which I had grown in a 20lt bucket, two small cabbages, +/- 200gms of peas and too many lettuce leaves to count - not to mention fresh herbs - rosemary, sage, basil, parsely and chives.

I can't explain it but these were amongst the best sweet potatoes we have ever eaten

I love it!!  Salad has never tasted as good!

It took me a full week to complete all of this, and just as I settled back yesterday evening to enjoy the view who popped by but this friendly Robin - almost saying, "Thanks for digging up all these insects, and I like what you've done with the place".

Can you spot him - he's checking out what I've done from the top of the rake
Well, Roger Robin, I like it too - very much!

Thursday, 26 August 2010

My bread recipe

In line with my "don't wait until we're on the farm to try out new idea's" decision, I made up a batch of my bread recipe at the beginning of the week, and it occurred to me, and I was asked by African Bliss, who contacted me, to put the recipe on my blog.


Unfortunately, though, at the moment I am having to cook it in my electric oven in Cape Town - but I also cooked a couple of chickens at the same time - I hate to use an electric oven for only one item.  I can't wait to see how this recipe works in the Dover stove.

It is dead easy - no kneading required - which with my old "tennis elbow" (even though I don't play / have never played tennis) injury it suits me just fine.  The recipe comes from the following site: http://www.motherearthnews.com/Real-Food/Artisan-Bread-In-Five-Minutes-A-Day.aspx?page=2

What you need to do is the following:

Take a large container (with loose fitting lid) and add to it :-

3 cups / 750ml warm water (I find that using water at 107oF / 41oC works brilliantly for me)
3 level teaspoons / 15 gm (1 1/2 sachets) granulated yeast
3 teaspoons / 45gm brown sugar

Mix all the above together and allow to sit until frothy - about 20 - 30 minutes.

Mix together:

1 - 1 1/4 tbs / 20 gm salt (I use either Himalayan Rock salt or Maddon sea salt)
6 1/2 cups / 750gm 50/50 mix of white and brown bread flour (that way I get the men in my life to eat some brown bread without too much fuss - why are most men fixated on white bread??)

When the water/yeast/sugar is frothy slowly add the flour and salt to the mixture - approximately a level cup at a time, stirring to combine.  You can use an electric mixer or food processor with a dough attachment, but it not necessary - a wooden spoon / silicone spoon works great - so rather save the electricity.  All it takes is 5 minutes to mix the flour into the yeast water.  It results in a loose dough which will conform to the container.

Cover loosely (do not use a screw top jar - it could explode from the trapped gases) and set aside to rise for 2 hours at room temperature.  (Longer rising time will not hurt the dough - I have left it for 4 hours)  You can use any amount of the dough after this time, but if you refrigerate it, it is less stricky to work with than dough which is at room temperature.  Jeff Hertzberg and Zoë François (the authors of this recipe) recommend that the dough be refrigerated for at least 3 hours before shaping a loaf.

I don't have a pizza wheel, so I use a pliable vegetable cutting board which I liberally dust with cornflour.  This is so that the dough can easily be transferred to the baking stone in your oven.

When you are ready to bake bread, remove the dough container from the fridge and sprinkle some extra flour on the top surface.  Then cut off a large grapefruit sized piece with a serrated knife. Rub a little flour on your hands and holding the dough, stretch and fold over two of the corners to the bottom on all four sides - rotating the ball as you go.  You should end up with dough which has a bunched base of the four corners - this will flatten out during the resting and baking.

Now place your dough on the pizza wheel / cutting board and let it rest uncovered for 40 minutes.

20 - 30 minutes before baking, place your baking stone inside and turn your oven on to 400oF / 200oC.  I don't have a genuine baking stone, so I use one of the extra floor tiles which were left over from our floor - I reckon that a good scrub and then baking at 200oC eliminates 99.9% of the germs.  Also, place an ovenproof container on a lower shelf in the oven - this is to hold the water which is added when you place your dough in the oven.

Dust the top of the bread liberally with flour and slash the top with a serrated knife - a couple of slashes, or a deep cross - whatever.  This helps the dough expand during cooking.

When the oven is at the correct temperature open the door, and with a forward jerking movement slide the dough off the pizza wheel / cutting board and onto the baking stone.  Then quickly pour a cup of hot water into the ovenproof container below and close the door to trap the resulting steam in the oven.

Bake for 30 minutes until it is nicely browned and firm to the touch.

Allow to cool on a wire rack.

It produces the crispiest crust and the most moist centre I have ever eaten.  And it is also good the next day - or even the day after - if the loaf lasts that long!


Return the remaining dough in the container to the fridge and use within 2 weeks. You can apparently even freeze portion sizes in an airtight container and defrost in the refrigerator overnight.