"Self-sufficiency does not mean 'going back' to the acceptance of a lower standard of living. On the contrary, it is the striving for a higher standard of living, for food that is organically grown and good, for the good life in pleasant surroundings... and for the satisfaction that comes from doing difficult and intricate jobs well and successfully." John Seymour ~ Self Sufficiency 2003

Saturday 27 October 2012

Heavens Bounty

Firstly, please join me in welcoming Lynni.
Lynni doesn't appear to have a blog - Lynni, if I'm wrong please let me know.  Thanks for hitting the followers button :)

Update: Lynni's blog can be found at: http://all--in--the--family.blogspot.com/

To quote from her profile info: she is: "a mum and foster mum to 12 now 13 great kids. We live in suburbia and try to live a 'greener' life. I make our bread,bake in a woodstove, cook from scratch, knit, crochet and sew, grow vegetables and some fruit, keep chickens, make soap and natural cleaning products. I have lot's of recipe books but never know what to have for dinner. I wish there were more hours in the day and I wish there were no fruit fly."

Lynni - huge admiration to you from me - where do you get the stamina to be mum to that number of children...!

Btw, I l-o-v-e your Esse Ironheart Woodstove :)  Where did you find it?


----------------

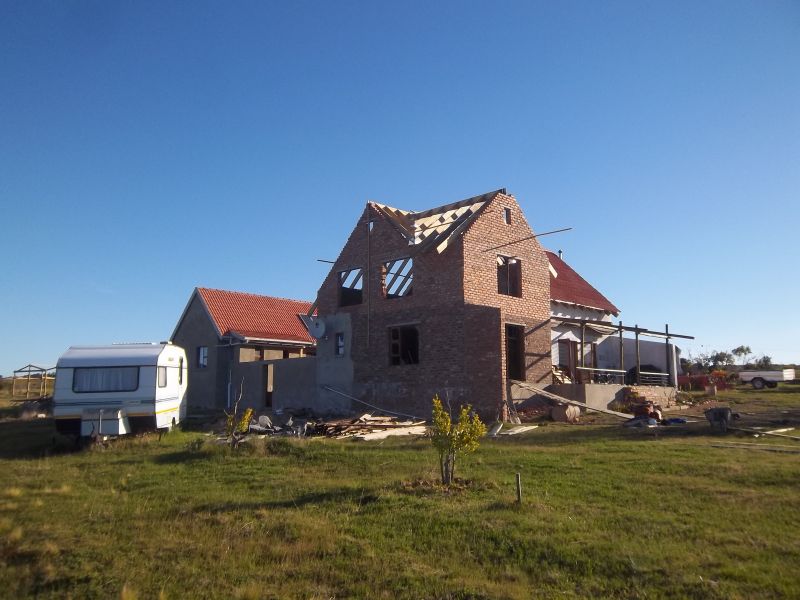
Now that the gutters are up we have started harvesting our rain water.

RMan schlepped two 1000lt tanks with us from town.  They had been used to store oil for a bakery, and, once empty, were just standing in the veld, doing nothing.  A good clean out with vinegar, and vinegar and water, although messy, eventually did the job.

RMan and John, our local part-time labourer, sorted out the slab base for the tank(s).  We needed to get the inlet fittings for the large 5000lt tank we purchased from our local co-op, so for the meantime we steered the water to the smaller 1000lt tank.
The gutter downpipe first got connected to the
smaller tank
Big(ger) Brother was watching, so Little Tank behaved herself.
Don't they look cute, sitting side by side on the
concrete slab.  Only the side of the garage roof
facing you in this picture caught over 500lts

of rainwater from 15mls of rain - that's from
 a roof at 45° measuring 9 mtrs long.
Over 500lts of rain water was captured from 15mls of rain which fell only on one side of the garage roof.
Only 15mls of rain gave
us over 500lts
We have since purchased another 5000lt tank.

Bearing in mind that we only connected the one large tank to the downpipes late on Thursday and the other one at lunchtime on Saturday, after the 180mm of rain which fell from Wednesday to Sunday last week, we now have 2 X full 1000lt tanks, one 5000lt tank that is over 3/4 full and the other 5000lt tank has about 3000 lts.  And we have an overflowing dam once again :)

We will need to purchase a further two 5000lt tanks - for the two other downpipes.  And then we're planning on buying a further four 5000lt tanks, which we will place on the highest point of the property.  As strange as it may seem, 2 X 500lt tanks are cheaper than 1 X 10 000lt tank!

That will eventually give us a total water storage of 42 000 ltrs (9 - 10 000 gal) of precious rain water.  Could come in handy :)

As soon as the tanks at the base of the downpipes are full, the contents will be pumped up to the 4 X storage tanks.  To pump the water it looks like RMan will be buying a petrol powered pump - and he has a choice of two.  One has a 30mtr head pump, and will do an adequate job.  The other is strong enough, and is designed, to pump water with hectic pressure in order to fight fires.  Given our long, hot, windy summers that may better suit our purposes...

RMan says he's still deciding, but I know (him) better.  He was originally talking about sorting out a solar powered pump, but, given the area's susceptibility to summer fires, I think that the more reliable source of moving the water (in case it's ever needed for fire fighting) may be the wiser option.  Just in case it is ever required...

Tuesday 23 October 2012

Broad (fava) beans 2012

We have had hectic rain in the past week - a total of 180mm (+/- 7 inches) to be precise.  But, all that prolonged overcast, wet weather put a serious dint in our solar power storage.  Luxuries like blogging fell by the wayside, as power for the fridge and lights took preference. 

Before the wet weather set in I had managed to harvest the last of our broad beans for 2012.

In anticipation of the hectic windy conditions I had them growing in all sorts of places - like next to conifers.  That actually worked well... :)
Broad beans being supported by
a conifer
...and made finding and harvesting them much easier than if they were all sprawled on the ground...
They climbed up inside the conifers
branches, and made the h
arvesting
of the beans much easier LOL
... but the predictable wind still managed to get it's way some of the time...
The wind managed to have it's way with this lot though
Between the nasty giant yellow slugs and the field mice, the tithe was willingly given.
Mice and slug holes - ah well, guess that's the
tithe taken care of.
But, can anyone tell me what is wrong with these beans?  Those black spots bother me.  Not enough to stop me from eating the  contents of these pods.  But, enough to want to find out what is wrong with some of my broad beans.
Broad bean infection?
Last year I froze a whole bunch of my broad bean harvest, but, for some reason they "turned" in the freezer.  So badly that our friend, and GP, Dr A, said that "if that's what I'm raving about, I can keep them.  If he never tastes another one in his lifetime, that's fine by him"...  So this year I took a leaf out of Mr H's book and I left beans to dry in what sun there was.  Be warned though.  If you choose this method of drying your broad beans, they turn a mucky shade of brown.  Mr H assures me that they are still delicious though... :)
Sun dried broad beans
I roped MKid in to help with the harvesting and shelling.
A small portion of our broad bean harvest this year
Bless him, he told me that picking his own peas and beans, and shelling them is his most favourite past time ever...!  Anyone want the services of a willing worker, who is excellent at what he does, and all he wants in return is a cooldrink to quench the thirst, and an ice cream to cool down the hot, busy fingers?
MKid was such a help - and he loved the chore :)
But, there was an unexpected bonus this year.  RMan doesn't like the "extra" shell on the cooked beans, so I stood there patiently peeling them off after I had cooked them.  I accidentally pushed a couple of the empty shells with my elbow and they landed on the floor.  Scallywag pouched on them!
Scallywag - picking out the broad bean shells in
preference to the proper dog food.
It turns out that dogs l-o-v-e broad beans - even the empty shells!  Go figure :)

At least I don't have to add the cooked shells to my compost heap anymore - I always hesitate throwing something cooked into the compost - now I don't need to.

Sunday 14 October 2012

Phase Two

Quick note:  Apologies for the sparse blog posts recently.  Unfortunately Vodacom's dongle didn't do an adequate enough job, and we have had to resort to taking out a more expensive wireless internet connection contract.  But, we have, since last Friday, had a 1024kbps connection, so <giddy laugh here> we're back to normal :)

And.

WhooHooooooooooo!

The builders finally have only one last day on site - to sort out the last of my snag list.  And that day will probably be next Thursday (18th October).  Silly, but necessary things, such as completing the cementing in of the roof ridge tiles, closing up the gaps where the wall meets the roof, and which the birds have delighted in finding, as it provides an ideal, protected, wind-free space to build their nests - and to also work their way into our ceiling area.

They started Phase Two in mid / late August.

This is what Phase One looked like before they started...
Mid-August 2012 state of build 
...and trust me, I have the greatest respect for their ability.  I could barely walk up their building planks, never mind do this...
I couldn't push that wheelbarrow up that ramp
not even with assistance - no bloody way...
... and in one week they were at this point of the build...
Early September 2012 state of build - gable walls
and windows went in
... another week later and the roof trusses were being installed...
Mid-September 2012 state of build - roof trusses
... and another week resulted in the roof tiles being hammered into place...
Roof tiles and plaster work
...  then came the time to add the fascia boards and gutters.  And to install the wooden deck in front of our bedroom's "happy doors".

This is what our build looks like at this moment in time...
Almost there...
... we're still waiting for our double glazed glass to make the structure weather proof, but hopefully we'll get those this coming week.  
Double glazed glass, paintwork and tidying up is
all that's left
We better!  After 3 solid months of living (camping) on a building site, with the noise, dust, confusion and lack of privacy that that entails, I'm tired of camping - living in a small 3 X 2.5 mtr room at the back of the garage.  I need a change of decent clothing - all those suitcases to unpack...

And I need to get everything out of the storage garage - my measuring cups, scale, pots, pans and decent plates to eat off.  My TV chair, and RMan his TV couch.  Pictures to hang on the wall.  And more boxes than I know what to do with, or where to empty into, to unpack...  Can't wait!

In other words, it is now time to change this house into a home.

But, before we can do that, we need to at least splash on a coat of plaster primer.  We still have 25lts of Harlequin Low VOC (Volatile Organic Compounds) Plaster Primer so that has been slapped onto the main bedroom walls this morning.  RMan likes, and has the patience for the finicky work...

...me - give me the wide open spaces :)
Jack Sprat and all that...

RMan and I compliment each other in order to get a job done.  Only problem is when we "meet" at a particular painting point.  Then, my large paint roller beats his small paint brush hands down.  And, being a gentleman, he gives way to me until I've got my bit done LOL  It's either that or I may mistake him for being part of the wall...;)  Well, that's my excuse and I'm sticking to it.

I have also found that Plascon makes a Zero VOC plaster primer, wall and ceiling paint, and so, because there is no supplier of Harlequin paint in our area, so (yipee!) we will be using Plascon Evolution to coat our walls :)  Even though it is slightly more expensive, it's better than Harlequin because it's zero, and Harlequin is low, VOC.

Ah, I love it when a (my) plan comes together... :)

Btw, it's tiring work - project managing.  But, I will soon be able to hang up my building inspector gloves and become who I am again - Dani - wife, mother and grandmother, gardener, bookkeeper, blogger and, most importantly, homemaker.  For the home in the center of a family.  A place of refuge, of solace and of comfort- even if your kids are all grown and have fled the nest.  And, in my book, that centre must be organized to function as it should...

Happy days :)

Thursday 11 October 2012

For "Just Me"

I received the following welcome e-mail from Just Me 

Dani - thank you so much for sharing all of the details of your PV system in these two posts! If I'm not being too greedy, can I ask for one more photo of the display on your Outback charge controller - when the IN voltage is under 60 and the OUT voltage is still over 12. I know there are a lot of folks watching and learning from you. The MPPT controllers are generally much more efficient than the less expensive PWM charge controllers, but the differences lose a lot of folks in the math. That difference becomes really obvious when you look at panels connected in series for an MPPT controller versus panels connected in parallel for a PWM controller. When the panels are putting out less voltage than the battery level, a PWM controller will not charge the batteries at all but an MPPT controller will continue to put watts in the bank until the sum of the panel voltages drops below the battery level. This makes a HUGE difference on partly cloudy days and early morning and late evening. With your setup, you should still be drawing solar power into the batteries when each panel's individual output has dropped to 3V! Well done! 

Well, Just Me, here is the pic as requested...


This pic of our Outback charge
controller was taken at 7.00p.m. when
it was overcast and dark outside

Here is a close-up of the Outback charge controller screen:
We have also noticed is that even the moon and starlight generates volts - at 8.30p.m. last night 8.6 volts was incoming.

Just Me - thank you for your e-mail - I'm very grateful for the education.  Should the occasion arise in future, feel free to comment on my blog - that way everyone can learn from my mistake :)  But, I reckon it's just as well that RMan is in charge of the power generation...

Tuesday 2 October 2012

In for a penny,,,

Following my last posting on our solar panel upgrade and installation, I thought I should give you a peek into our new power room, which is located in the southern side (the cooler side in the Southern hemisphere) of our *new* garage :)  Our old setup with the 4 X 130Ah Deep Cycle batteries did what was required of it i.e. run the alarm when we were not here, and kept our little bar fridge more or less in working order.  But the batteries were too damaged to provide us with anything like the power we needed now that we are living here permanently.  
Inadequate power set up, comprising of
4 X 130Ah Deep cycle batteries,
distance from the solar panels to the
inverter was too far (= loss of energy
capture) and the Phocos 40 amp solar power
charge controller which was too weak to handle
the job we gave it. Seriously, we melted the thing!
We were using roughly 15.5 KwH / day in our town house or 465 KwH / month. That was costing us ZAR1.18 / KwH or ZAR625.52 / month (incl. V.A.T.).

With that in mind I took a snap of the Owl electricity monitor at exactly three months use (to the minute LOL - no, I'm not OCD - I just wanted to give you an apples for apples comparison, and "to the minute" was exactly when we arrived on the farm on the 29th June 2012.)
Our Owl shows that we :
are currently using 139 watts of power at 20.44h
the internal temperature is 16.5 oC
- and - most importantly,
we have used 150.88 KwH since we
arrived on the farm on the 29th June 2012
Here, being more aware of what power we have available, and ensuring that everything unnecessary is switched off / unplugged when it is not required / being used (that includes your iPhone charger, RMan! ;) ), we have, via our solar power, consumed 150.88 KwH in three months, or 50.29 KwH / month.  Which would have cost us ZAR59.34 month.  And 50.29KwH is roughly 10.54% of our normal monthly electricity bill.
Our Cotek 1000 watt inverter, although small,
is sufficient for now, but in hindsight we should've
purchased a 2000watt inverter.  All green lights =
input load is sufficient, battery charge is sufficient
and output load is good :)
With that calculation out of the way, I can now tell you that, at our current usage, our solar panels will be paid off, via our savings on our electricity bill, in 74 months (6.18 years) without any further electricity price hikes being taken into account.  And, bearing in mind that Escom wants to whack South Africans with a 15.11% price hike for the 2012 / 2013 period, I am hazarding a very safe bet that our panels will definitely be paid off faster than the 6.18 years.  From that moment on our power is "free-er" :)
As you can see from our new
Outback charge controller,
we c
urrently have an input of
74.2 volts (8.7Amps)
and the output is 13.5 volts

(40.2Amps).
At 14.4 volts (the way I
understand it) the batteries "float"
i.e. they automatically equalize their
charge. You can also see the solar
panels have generated 1.8 KwH thus
far today (12.30p.m.) and the batteries
are currently being charged with 540 watts 
As far as replacement costs are concerned, the solar panels have a guaranteed lifetime of 25 years, and the 6 X 2volt batteries for 7 -10 years (depending on how you take care of them (top up the water when required, watch the output load, etc)).  When it comes time to replace these items, their costs will, hopefully, have come down quite substantially.  Solar panels currently cost ZAR11 - 14 / watt in South Africa for poly crystalline panels.  Apparently. those in the solar panel manufacturing industry are aiming to get the cost of solar panels down to below ZAR8.20 ($1.00) / watt!  
Our new solar power wiring diagram:
this photo illustrates how our solar panels
are connected to the charge controller
(not shown), and the 2 volt batteries
are connected to the Outback charge controller
and the Cotek inverter.  The yellow and orange
screw caps (floater things) on top of the
batteries indicate the health (water level) of the
batteries.
What we purchased was this:

5 X 135watt solar panels
6 X 1188Ah 2volt batteries which we have linked in series to give us 12 volt
1 X Outback 60Amp charge controller
and add all that to our existing 1000watt Cotek inverter 

We subsequently returned the 3 X 85watt solar panels which we had purchased for our neighbour, and which he didn't want, and exchanged them for another 1 X 135watt panel, which we are going to use in conjunction with the 4 X 130Ah Deep cycle batteries and a water pump - to occasionally, and when necessary, move the water from our rain water barrels next to the house, up to water storage tanks which will be located at the top of our property.  More on rain water storage later...
Our 6 X 1188Ah 2 volt batteries are wired in
series to make up the 12 volts we require.
Please note that this is how we were advised
to wire up our batteries.  Please check with
your local solar power agent regarding your
specific wiring requirements
Now, I realize that not everyone can afford to lay out a fair whack of money in order to get off the grid.  But, by taking baby-steps, savings are possible through investing in some solar powered lights - both for internal and external use), unplugging all those chargers which come with all those fancy new must have gadgets, switching off your power hungry hot water geysers and only switching them on for 1/2 hour prior to using them (or, if you can afford it, changing to a solar powered geyser), and ditching your electric stove / oven and using the sun to cook 95% of your meals :)

Which reminds me, my Sun Cook solar ovens order is on it's way from Portugal, so, not too much longer to all of you who have ordered one... :)