"Self-sufficiency does not mean 'going back' to the acceptance of a lower standard of living. On the contrary, it is the striving for a higher standard of living, for food that is organically grown and good, for the good life in pleasant surroundings... and for the satisfaction that comes from doing difficult and intricate jobs well and successfully." John Seymour ~ Self Sufficiency 2003
Showing posts with label hydroponics. Show all posts

Saturday, 17 June 2017

Hydroponic update

You'll remember last year back in April I started a small hydroponic system.

This is a report back and a change of plan.
My newly installed small hydroponic ssystem
The lettuce still found the direct sunlight too strong and went to seed.  I will have to grow them in the shade next summer, with light being provided by bouncing it off a north facing wall.
The cabbages grown in the ground, without question, performed
 better than the hydroponic ones
 The cabbages - nope, not successful.
The hydroponic peas did well, and also didn't display any signs
 of "mildew" on their leaves
The peas?  They did beautifully 😄

And the tomatoes - they produced nicely - though not as well as those that were planted in the ground.

So, not a great result.  Not a "Yeeeha, Eureka!!" moment.

Perhaps it was my "feeding" of the water.  Being out in the sticks, and not wanting to incur costs buying and transporting hydroponic plant "food" I only used a seaweed concentrate in the pump tank.

But, I am not discouraged.

So, I have drawn inspriation from this pic I saw a while ago...
This image inspired me to plant strawberries in gutters which
hang on either side of my raised beds
As you know I hung gutters on the side edges of my raised beds and planted strawberries in them.
The current situation / progress of my gutter strawberries
(nope, they aren't battling weeds, but rather self-seeded
 rocket seedlings.  I love rocket, so I'm letting them stay
where they fell)
They are doing well, and this seasons strawberries are beginning to form and hang down the sides of the gutter.    So, I have decided to use the hydroponic pipe to grow strawberries and I will leave the exisiting  strawbwerry plants in the gutter for comparison.

Yes.  I can grow strawberries in the ground, and they have been successful, but the slugs have been just as successful in their quest to devour portions of every strawberry that happened to touch the soil.
The reserve / return reservoir which collects the pumped water back
 to the pumping tank via gravity.
I have suspended a stocking filled with organic fertiliser beneath
 the pipe's overflow outlet.
In place of the seaweed concentrate, I have added a measured portion of organic fertilizer to a stocking which hangs into the return water reservoir.  Everytime the pump switches on, the water falling into the reservoir falls onto the stocking (and it's contents) thereby "disturbing" it and releasing the nutrients.
The organic fertilizer RMan uses for our fruit trees
I planted the hydroponic strawberry runners about 3 weeks ago, and already the roots are beginning to grow out of the bottom of the yoghurt containers I use as hydroponic plant pots. 
New strawberry runners planted three weeks ago are already
 producing roots outside of the tub.  The strawberries were planted
 in a palm peat / vermiculite mixture.
I have the pump on a timer which switches on for 15 minutes every hour from 7.00a.m. to 7.00 p.m.  After that the water which remains in the pipe must suffice until the pump circulates the water again.
A shallow "bowl" of water permanently remains in the base of the
 pipe for access by the plants when required.  It doesn't fill the
 pipe completely and thereby provides air to the roots as well.
The new strawberry plants seem happy and are beginning to grow new leaves.
That, to me is a happy looking strawberry plant 😃
Let's see if I can get it right this time...

I am determined to be successful, as, given climate change / global warming / predicted global water shortages, I believe that hydroponics will figure massively in the future with regards to feeding the masses.  Being inquisitive, I would like to understand the process / problems in using this growing method.

Saturday, 20 August 2016

Hydroponics vs ground 2

Time for an update on the vegetables which I am trialling in our basic hydroponic system.

Once again, I was let down / felt great disappointment with the manufactures of seedlings.

Last year (autumn / winter 2015) I purchased some cabbage seedlings, and they grew wonderfully - only problem was is that they were cauliflower seedlings :(  This year what was labelled as cabbages turned out to be broccoli.
Broccoli not cabbages grrrrrr!
Finding this out at the end of the growing season does not please me!!  The alpacas love cabbage, and they had to go without home grown cabbage yet again.
The soil grown broccoli is still not producing
 and, 3 weeks ago, was roughly half the size
 of the ones in the hydroponic pots
What I have found with the hydroponic vs soil grown plants was that the cabbage broccoli went to seed very quickly in the hydroponic container, but, as can be seen from the pics above and below, the soil grown cabbage is performing much better.

So, cabbage broccoli won't be hydroponic-ed again.
The red cabbages I planted - as you can see
 the soil grown ones are leaps and bounds
 ahead of the hydroponic ones
The peas, on the other hand are working well.
My hydroponic peas - 3 weeks ago
4 weeks ago they looked like the image above...
The hydroponic pea plants today
 ... and today the plants are twice the size / height - at roughly 1.4 mtrs tall.
There are loads of pea pods on the
 hydroponically grown pea plants
Happily, the plants are laden with pea pods too :)

The comparison between the soil grown pea plants and those grown hydroponically?  The land grown ones were planted roughly 5 - 6 weeks before the hydroponic ones so it's not that easy to demonstrate with pics, but I reckon that the hydroponic pea plants have more pods on them.

Do I need to grow them hydroponically?

Nope - they  normally do well in the ground, but I was so excited about the hydroponic system we had set up that I wanted to grow something - anything - to trial it before the coming summer, and peas were all I had to hand at the time.

But, I am satisfied that the system is working.

I will be growing tomatoes and peppers hydroponically this coming summer - as well as in the ground.  Apart from the piquanté peppers, I do not seem to be that successful with normal red / green / yellow / orange capsicum - the plants are permanently in a state of "wilt" no matter how much water I give them, and the peppers themselves seem to be susceptible to rotting on the plant very quickly.

So again, with this experiment, let's see which produces more and which plants do better?

Monday, 4 July 2016

Prepare yourselves...


...life is going to be very different on Mother Earth.  It would appear that we have passed the point of no return, and there is no going back.

This is seriously scary stuff...


'Unprecedented': Scientists Declare Global Climate Emergency After Jet Stream Crosses Equator

http://www.rawstory.com/2016/06/unprecedented-scientists-declare-global-climate-emergency-after-jet-stream-crosses-equator/
 or if you want to watch this on YouTube:
 
https://www.youtube.com/watch?v=CKasUm77D0U
Take the time to consider how this change in our weather / climate / jet stream is going to affect you, and how you, personally, can mitigate the changes to enable you to continue to grow your own produce and provide for yourselves.


I wrote this posting above before :

1) I lost my internet connection for 3 days due to vandalism
2) I discovered that there is no need to panic - jet streams moving from the northern to southern hemispere, and back are apparently "normal" (https://www.washingtonpost.com/news/capital-weather-gang/wp/2016/06/30/claim-that-jet-stream-crossing-equator-is-climate-emergency-is-utter-nonsense/) 

But, the original article does raise a point.  Actually, a couple of points.

Climate change, is, I believe, irrefutable, and with that in mind, the more steps we all take to prepare ourselves for the difficulties that lie ahead, the better off we will be to assist those in need / without knowledge when the time comes.  Standing back and waiting for someone else to solve our problems is the normal reaction.  But, being proactive, and starting the process for ourselves - and for our children - will stand us in better stead.

What can you do I hear some of you ask?

1)  Conserve water - don't take your access to water for granted, not even if you have a crystal clear stream passing through your property.

i)  Source (if necessary) and seriously apply mulch around your plants
ii)  Collect and store whatever rainwater falls in whichever way you can
iii)  Experiment with a simple hydroponic / aquaponic system - don't let the fear of the unknown stop you from investigating this food growing avenue. Experimenting now will allow you to become more "qualified" and able to use this method confidentially in the future.  (note - we have had to make an adjustment with our hydroponic experiment - more news coming up in a future posting).

2) Adapt

i) Be prepared to change the types of crops that you normally grow - for instance consider growing different crops that are suitable for the changing weather in your area
ii) Invest in shade netting / greenhouse tunnels to assist your plants in performing / providing to their maximum ability.
iii)  If there are crops that require a certain amount of rainfall, start researching similar alternatives which will provide you with those nutrients / carbohydrates / proteins now - don't wait until TSHTF.

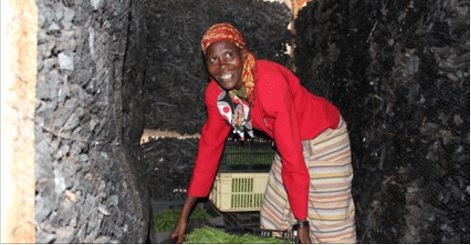
This charcoal cooler room reduces the outside
temperature from 30°C to 8°C
http://www.nation.co.ke/business/seedsofgold/Our-charcoal-cooler-keeps-produce-fresh-/-/2301238/2397960/-/119pv5mz/-/index.html


3 Look to the 3rd World people / underprivileged for idea's on how to cope in what will be, for you, "different" times but for them it is perfectly natural

i)  For storing food long(er) term without adding additional strain on the system / environment, their innovative ways are amazing e.g. charcoal cooler rooms for storing harvests.  Such a blooming simple idea, and it obviously works :)  And is a damn sight cheaper than (electric) refrigeration...
ii)  Learn to preserve your harvests via dehydration or canning - it's not difficult if you get yourself a reputable preserving book.  And is oh, so gratifying, to use those preserves out of season.  Plus you get the added benefit of knowing exactly what is in what you are eating and can be reassured that GMO and chemicals are not forming a hidden part of your or your family's nutritional intake.
iii)  Investigate (a.k.a. Google lol) how they manage to grow crops in their adverse climates (both extremely hot and cold) and what measures they take to ensure that they are able to harvest something / anything...

Those are just a few thoughts I wanted to share with you and they are just a few of the steps that can be taken now that will benefit you in future.

I leave you with this:


http://www.forbes.com/sites/marshallshepherd/2016/07/02/lessons-from-jet-stream-crossing-the-equator-mania/#8535b905a8c3

P.P.S.

This is what the vandals did - this little action affected at least 350 - 500 people!
The power junction box was ripped off
 the tower and the cables were
 disconnected.  I took Escom 4 days
to repair... :(

Friday, 20 May 2016

Hydroponics vs ground 1

Following my posting on the basic hydroponic system we set up, I thought I'd give you all an update.

But first, I omitted to share with you the analysis of the alpaca poo we had done.


Alapaca poo analysis
The gentleman we saw told us that the alpaca poo results were fantastic.  Even asked us if we want to market it lol  Perhaps if we had 50 alpacas, but with only 4 - they just don't poo enough to make it viable...
Results of grape waste (pomace) analysis
For comparison, I am also giving the sample results of grape waste that he gave us.  As you can see, the alpaca poo is far more nutrient rich than the grape waste.

Of the various experiments I am trying out, I planted some cabbage seedlings in the gravity fed hydroponic system, and some in the ground below the hydroponics.  [One of my brothers reckons that cabbage needs a firm footing (in the ground) and he is doubtful that growing them hydroponically will work.  I'm not looking to grow champion sized cabbages, so let's see ;) ]

But, and for update on the cabbages I planted only three weeks ago:

This is the cabbage in the ground.  Not much change there, is there.  They were planted with some additional alpaca poo.
The control "ground planted" cabbage -
 not much change from when it was planted
 out from the seedling tray
And the hydroponic one...
The hydroponically growing cabbage - almost
double the size and far sturdier looking
 leaves and plant, and more abundant growth
As you can see there is quite a substantial change.

Water catchment tank specifications
The only feeding that the hydroponic system gets is some Seagrow (seaweed extract) and a knee high stocking which has been half filled with ground alpaca poo, and which is suspended in the receiving tank so that the nutrients can leach out into the water as it fills the tank.

Very encouraging.

I will update as the two plants progress - until one of them reaches cabbage head stage... :)

Saturday, 23 April 2016

New project revealed

Warning: a long, and picture heavy posting...

Today the new project RMan and I have just completed is revealed.

Last summer was an eye opener - the daytime temperatures soared to new record levels.  We experienced such heat that even RMan, who is definitely a summer person, was wilting.  We even talked about possibly covering (!?) our fruit trees in a shade cloth structure in future.  Thank goodness for our double glazing and double vaulted ceiling - the temperatures inside the house were comfortable and non-restricting.

However, my plants still suffered.  Even though we had taken the precaution of laying down plenty of mulch, the ambient temperature was too high for the leaves.

As for my veggies - too many of them bolted and formed early seed heads, and those that did managed to produce didn't produce their normal quantity.  Obviously they were under too much stress...  Except for the pumpkins in the tyres filled with alpaca poo.  They were the absolute stars of the garden :)

But, given that global warming / climate change is not going to "go away" I had to try and overcome this latest problem proactively.  And I had to overcome it in such a way that I could ensure guaranteed growing of our veggies (whilst still remaining aware of our water availability) going forward.

I am not someone who just reacts, and then sits and bewails my fate.  Rather, I prefer to take a proactive approach to whatever problem has presented itself ;)

So, to give you a quick reminder of the hints I've given you:


So, what did we do with all of this, and what has this to do with growing crops in the face of evident global warming / climate change?

Taaaa Daaaaa!
We mounted the drilled 110mm pipe to the
sides of the shadecloth veggie patch walls.
 I have left the holes in the 110mm pipe which
do not yet contain plants / pots covered so
that they do not permit light into the pipe and
cause algae to grow
Along the inside of the outer "walls" the original shadecloth veggie patch we have installed a hydroponic system for those plants which are water hungry.  Lettuce, raddish, peppers, possibly eggplant and even, I'm hoping, tomatoes :)  And this winter I'm also going to try growing some cabbage and broccoli normally in the ground, as a control, and also growing it hydroponically.  Let's see if there's a difference.

Once we had all the components, it took a day to set up, and all indications are that the plants I have growing in it now are loving it.


Being a closed ebb and flow system means that daylight should not cause algae to grow in the water in the pipe / tanks.
Do you remember when RMan went to
 an auction - many moons ago?
Well, the electrical boxes he got there

 finally came in handy :)  It is
housing the power socket and timer
 for the water pump.  The power is from

 a plu in the garage which is 5 mtrs away
The pump is on a timer, and it is currently programmed to switch on every 3-odd hours (during autumn / winter) during the daylight hours for 15 minutes.  (During summer I will set the timer to switch on every 1 - 1.5 hours or  1.5 - 2 hours - the results will guide me.)

The pump is a 28 watt pump, with an adjustable maximum flow rate of 2 200ltrs / hour.  At 28watts and with the timer set to switch on 6 X / day for 15 minutes or 1.5 hours in total) the power consumption should be 42 watts per day.  Our solar system won't even notice it lol

The water is pumped from the pump tank via a 12mm irrigation pipe up into the 110mm pipe and floods the 110mm pipe and thus the plant pots containing the seedlings, coconut coir and vermiculite mix.   The small stones I placed at the base of the pots is to prevent the coconut coir / vermiculite mix from being washed out during the flooding.
Detail of the water flow out of the 100mm
 pipe into the "feeding" tankbefore being
gravity fed back to the pump tank.  When the
water lands in this tank, it splashes, causing air
to be mixed in with the water.  If I should find this
 isn't  sufficient, I will add a 2 watt airstone which
 I  already have to the pump tank.
The overflow / drainage from the flooded pipe is directed to a filtering / feeding tank (to which a dose of seaweed extract and an alpaca poo half-filled stocking has been added and which will be replaced weekly) which then drains back to the tank containing the water pump via gravity.
Tank containing the 28 watt water pump
Round and round and round - well, life is a circle isn't it :)

Given that potatoes are now costing anywhere from ZAR73.00++ / 5kgs, the veggie beds, which housed the plants which are now going to be grown in the hydroponic system, can now grow potatoes instead :)  (we eat l-o-t-s of potatoes lol  Mashed, baked, roast, plain boiled and served with a dollop of parsley butter, pomme frites, potato salad, pommes dauphinoise, gratin, etc.)
Las summer pumpkins grown in alpaca filled tyres
 and the shoots were suspended along the fence
 of the uncovered veggie patch.
Pumpkins - they worked so well that they'll still be grown in alpaca poo filled tyres next summer...
Raised veggie bed during construction
... garlic, ginger, swiss chard and carrots will be grown in my raised veggie beds, and as for beans - they may end up in the raised beds and / or the hydroponic system too.  Maybe, like the cabbage and broccoli, I'll try both methods of growing beans - just for comparison...?

Beetroot and onions grow well in my shadecloth veggie bed ground, so that's where they'll stay.

I reckon the shadecloth veggie patch is going to look very forest garden-y next summer :)

And that covers all the veggies I normally grow.

Saving water, helping vegetable plants grow, and working on continuing to provide food in the face of global warming / climate change.  I hope our hydroponic system works as anticipated...

-----------------------------------------

All the little tiny side shoots are new and
 have developed since I placed this lettuce seedling
 in the hydroponic system.
Postscript since writing this earlier this week:  The small lettuce plants which I removed from the soil about 10 days ago, washed the soil off the roots, and placed in the vermiculite and coconut coir filled pots in the hydroponic system have already grown new roots!!  :)
I chucked a couple of pea seeds into three pots -
 they are just beginning to peep out.  I also have
 peas growing in the ground (which were planted a
month or so ago) - let's see which do better /
are more prolific providers...
Also,some pea seeds have just peeked above ground (or should that be coconut coir).  Welcome, little guys :)

Monday, 18 April 2016

New project - part 3

I have mentioned before that there are plenty of stones in our area.  Not many large, useful ones, but many, many, many small irritating ones.  The size that are just perfect for distorting carrots which are trying to grow, or prevent RMan from raking up freshly scythed oats.

The stones on the road wash down whenever we have heavy rain (something I have a vague memory of - we have had exactly 1.5mm of rain thus far this month.  Previous years: 2014 = 33mm, 2015 = 53mm) - all different sizes of stones.  And, serendipitously, some of the stones are exactly the right size for my purpose. 
Soil test results.  The yellowed in area's show
deficiencies 
When we had our soil tested back in October 2014, the knowledgeable gentleman we saw told us that we should be grateful for those stones, as they contain valuable trace minerals which are beneficial for the garden.
The small pebbles were boiled for 10 minutes
So, off I toddled to our gate and harvested stones (pebbles) from the road.  I never thought I would import additional stones onto our property...

I boiled up the stones to make sure that they didn't contain any unfriendly pathogens.
To assist in water reaching inside the pot,
 RMan hauled out his drill
Then RMan, drilled some holes into the plant pots we had purchased...
I used the drilled plant pots to sort out
 exactly the size I required
... and I lined each pot with a thin layer.
Pebbles line the base of the pots
They will prevent the soon-to-be contents of the pots from leaving the pot, whilst still adding some of their trace minerals to the water as it flows through and past them...

Saturday, 16 April 2016

New project - part 2


More parts / components for our latest project...

A set of cutting discs was purchased.  Why a set,
 I've no idea?  Ask RMan

The 6 mtr long 100mm Ã˜ pipe was
 marked with a 
line down the middle...

... and then 87mm Ã˜ holes
were drilled along the
marked line at 250mm
intervals