"Self-sufficiency does not mean 'going back' to the acceptance of a lower standard of living. On the contrary, it is the striving for a higher standard of living, for food that is organically grown and good, for the good life in pleasant surroundings... and for the satisfaction that comes from doing difficult and intricate jobs well and successfully." John Seymour ~ Self Sufficiency 2003
Showing posts with label baking bread. Show all posts

Tuesday, 3 January 2017

Rye bread

All good wishes for 2017 to all my followers.  I hope it contains all and more than you hope for.

We had a wonderful, relaxing family-filled Christmas, but, all good things must come to an end, and work looms on the horizon again from next Monday... 

So, back to more mundane matters.

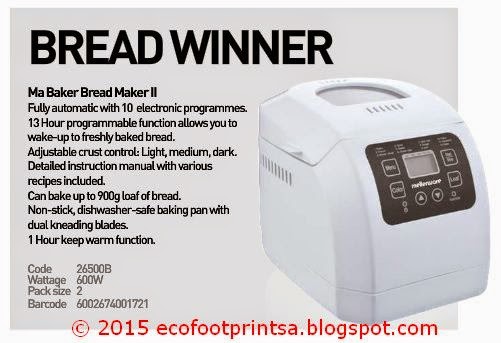
I have been disappointed in my bread machine.

Not because the bread it produces is inedible, but because the bread doesn't stay as fresh as shop bought bread. 

Well, duh, there are no added chemicals / improvers in my locally manufactured stone ground flour, homemade bread, Dani!

But, I was feeding the chickens / chucking away too much bread - RMan and I can't eat a loaf in 2 days.

I have, however, made some other excellent recipes in my bread machine - such as four ingredient corn bread, chocolate cake, banana bread.

Then I had a thought.  RMan and I love rye bread.  So, after contacting our local stone ground flour manufacturers, Eureka Mills, they kindly sent me a recipe for 50% rye bread to bake in my bread machine.
Too much dough which couldn't cook properly and caused the
 loaf to sink.
The recipe they sent was too much for my machine and caused the bread to sink in the middle as it couldn't cook properly.
The consistency of the 50% rye bread is great!!
I then tried halving the recipe, but, although the appearance of the baked loaf was better, the resulting loaf was teeny - barely enough to sink your teeth into.  Dainty sandwiches are great, but, sometimes you need a decent sized sandwich clutched in your grubby paws - do you know what I mean?
Half the recipe resulted in a teeny-weeny loaf
So, I finally tried 3/4 of the recipe.
This one is slightly misshapen, but 3/4 of the recipe gives me the best
 result 
That was much better :)
Soft, delicious - with an extended "shelf" life - without the
chemicals :D
If you would like to try out the recipe for yourself, here is the (adjusted) recipe with the quantities I use in red.
My 50% rye bread recipe for the bread machine
This rye bread stays "fresh" for a good 3 - 4 days, which is perfect for RMan and I.  I have taken to tossing in a handful (tablespoon) of fennel and caraway seeds together with all the other ingredients.

Yum :D

Wrapping my bread in towels doesn't keep it fresh in our dry climate, so, once the loaf is properly cool after baking,  I store it in a clear plastic bag which gets cleaned (washed out and hung to dry) out prior to another (new) loaf being deposited into it.  I think I have recycled the same plastic bag a good 4 dozen times thus far... ;)

Fresh bread in the house means we'll not go hungry this year... :D


For info on how you can obtain your own Foothills DryAway please click the link.

Wednesday, 25 May 2016

Winter joy

"To everything, turn, turn turn,
There is a season, turn, turn, turn..."
Early morning mists which settle into the stream
 / river valleys
You have to have contrast.  I am not a member of the "I hate winter" club.  Rather, I relish the cooler weather.  I am more mentally alert, more physically active, and more inspired in the kitchen.

Here are some of my favourite things that I love most about winter...
Sunrises...
... and sunsets
Brooding, inspiring, breath-taking sunrises and sunsets.

A wood burning fire - which not only heats our entire home, but also gives me access to an oven in which I can bake...
My darling Rosie
...roasted homegrown vegetables, homemade pies and samosas, bread, lasagnas and pizza.
4 ingredient mealie bread - the smell fills the air,
 and the taste is heavenly :)
(recipe here)
Homemade chicken or creamed spinach samosas
 in phyllo pastry (recipe here)
Lasagne, pies, samosas and pizza can't be cooked on top of our two plate gas stove, nor will the latter three be successful in my solar oven, so we go without / my menu options don't include those during the summer months. 
Rain - glorious rain.
I remember it well, and wait in anticipation
of it falling again...
Rain - filling our rain water tanks and earthen dam, refreshing the garden and cause the land around us to go green - as opposed to the dried out, brown appearance during summer :)
Long and short gumboots - for
use when it pelting down with rain which
forms muddy puddles everywhere, or
 when  there is just damp grass
Gumboots (long and short) to keep my feet dry, chunky jerseys and a down jacket against the cold outside air, and a warm bed to sleep in.  I am aware of all those who aren't as fortunate, and know that I'll never take those luxuries for granted.
Two and a half dehydrated pumpkins fit into
2 X 1 lt jars
Eating summer out-of-season home grown produce - which has either been canned or has been dehydrated in my new Foothills DryAway ;)


Homemade jams and beetroot...
  ...and tomato puree / concentrate
Dehydrated herbs and vegetables (which at this stage only
 include pumpkins and piquanté peppers)
Lying in bed in the morning, cup of rooibos tea (for me) or coffee (for RMan) in hand, looking at the snow capped mountains in the distance.
Snow capped mountains in the distance
  Aaaah!  What's not to love about winter...?  :D

Saturday, 20 February 2016

Vital crop

The one vegetable / fruit that I need to plant, and harvest in quantity, each year is tomatoes.

Last year I was devastated when the mice managed to eat / damage / decimate most of my tomato crop.  The little buggers weren't picky either - sampling this one, that one, any-which-one, and never finishing the meal they started.

What a waste!  Haven't they heard of food poverty?

Thankfully, this year we have seen very few mice in the garden, so I am harvesting enough tomatoes each week to keep me busy in the kitchen over the weekends, when the pressure of (income producing) work is lessened.
Clockwise from the top left:
My new purple tomatoes, golden yellow,
red beefsteak heirloom and cocktail tomatoes
Earlier in January I found a tomato seedling in the local nursery that had me intrigued - so, naturally, I had to buy a specimen.

It was a black (purple) tomato plant.

I have been excited - yes, it doesn't take much, does it ;) - to see what developed.

They are much smaller tomatoes, and really interesting.
A sliced purple tomato
As you can see in the pic above, when they are sliced, the inner edges still retain a touch of that "bruised" look.  I will be saving seeds from one of those I harvest in order to grow my own next year.

I need to make a salad from the different tomatoes I'm growing to show you the different colour contrasts.

A mixed tomato salad with a bit of basil and crumbled feta, sprinkled with balsamic and olive oil - heaven!!

But, the main reason I grow tomatoes is so that I can preserve them.
There are approximately 16 large beefsteak
 tomatoes reducing down in this pot - with 1 single
 yellow one added (it was almost over-ripe and I
 didn't want to waste it).
The must have staple of my pantry / freezer is tomato purée.

Cocktail tomatoes are to throw into a mixed salad.  Only.  I tried preserving them whole a few years ago, but it was a waste of time.  They disintegrated down into an insipid watery mush, and the small jars took up far too much space in my pantry.

Heirloom tomatoes, on the other hand, are invaluable.

My main source of tomato purée is from the heirloom tomatoes -  the beefsteak and the yellow one.  I love the irregular shape of the heirloom tomatoes - it almost gives each one a different character.

(Did you know that perfectly round tomatoes are a result of needing a suitably tidy shaped tomato to put on a take-away hamburger?  Have you ever hear anything more ridiculous?  The bloody hamburger dictates what tomatoes are commercially grown these days - if you can call them tomatoes, as I find them completely tasteless and pasty in colour.)
This is what I mean about a disfigured
 heirloom tomato.  Don't you love the
 uneven appearance of them :)
The heirloom tomatoes around the stem are normally "disfigured" as in the pic above.  I have no idea what causes that, but their taste is amazing, so I don't give a hoot.  The "disfigured" section goes to my worm farm occupants - the worms don't know any different lol

The yellow tomatoes are my favourite, too - and they make the most amazing tomato purée - producing a much deeper colour than that of the beefsteaks.  The purée from the yellow tomatoes seems almost tinged with a dash of turmeric. That is quite a contradiction, as I had imagined, given their yellow appearance, that that purée would have more of a yellow appearance.

I use the purée in a myriad of ways - for pizza bases, in casseroles, soups, dips, sauces, etc.  This winter I also want to try using it in bread, in place of water :)
Recycled plastic containers holding yummy
 thick tomato pur
ée paste cooling down
 before they are popped into the freezer.
1.125 ltrs of tomato to enliven those wintry
 nights.  One of those oval 125ml containers is
 enough for a meal.  I have also water bath preserved
tomato puree in larger Ball jars for my pantry :)
There is something about the luscious redness of tomatoes in winter which, together with a roaring "Rosie" uplifts the cold, dreary days.  The hint of spring around the corner, with the promise of the next tomato harvest...

Saturday, 2 January 2016

Are we strange?

Most people celebrate New years Eve with a party, or a special meal - in years gone by that was something like prawns, occasionally freshly caught lobster (when RMan went out in his boat and cast out his crayfish nets), etc.  ( I didn't go cray / lobster fishing with him often as the horizon wouldn't stay still for long enough...  Mind you, the couple of times I did go with him, I fed the fish quite adequately, so we were sort of giving back whilst we were taking ;) )

But, we don't make that much of a fuss about New Years these days.

Although we do tend to stay up long enough watch the international fireworks displays on TV - New Zealand / Aussie / Hong Kong and Saudi - we haven't made it to midnight in years.  We prefer to get a good night's rest - because the first morning of the year is just a normal new day on our smallholding, with animals which need our attention, and crops which need watering / weeding / harvesting.

And, forcing oneself to stay awake until midnight to have a quick burst of "excitement", and then hit the sack seems - well, almost pointless to us.

But, I do try and cook something, no matter how simple, which we've not had before, and this year was no different.

John, from Going Gently, has raved about Scotch Eggs for yonks.  I've never tasted a Scotch egg, let alone made one.

On New Years Eve all that changed.

We have fresh eggs from Tweedle Dee and Cluck - so why not? ;)
The simplicity of the plateful belies it's taste -
it was scrumptious :)  The remnants of my first
piece of cornbread is skulking behind the lemon lol
Using Jamie Oliver's Scotch Egg recipe guidelines, I thawed some Elgin Free Range chicken sausage to wrap around the hard boiled eggs - adding some homegrown chopped chives and parsley to the sausage meat which I had squished from the casing.

Then, I carefully dunked the sausage wrapped egg in milk, and breadcrumbs, and again in milk and breadcrumbs, and then left them to rest in the fridge until I was ready to cook them.

Deep frying them for 6 - 7 minutes (turning twice as the oil only came ¾ up the sides of the eggs) until the crumb coating was nicely browned, they were served with the juice from a freshly picked lemon, some homemade corn bread, homemade gherkins, and sliced cheese.

Conclusion?

Bloody marvellous mate!! :D

But, very filling...

As we couldn't finish the four I cooked, we left the remaining 1½ eggs covered overnight in the fridge and then had them for breakfast on New Years morning.

I honestly don't know which tasted better - the freshly prepared Scotch Egg or the chilled breakfast version :)

Sunday, 18 October 2015

Mostly homemade

Now that the weather is warmer stodgy, starchy meals are on the back burner.

I find that summer meals are so much easier than winter ones.  Don't get me wrong, I love cooking in the Rosie (and wish I could light it every day of the year), but, when it's too hot to light the Rosie, and not sunny enough to use the solar oven, then meals are (old caravan) stove top only.  And that normally takes a far amount of thought and preparation.

But, basically, if one has a loaf of homemade bread - your options are endless.

I have been googling 3 ingredient meals - the days here are so hectic, that I barely have time to think about what to cook, never mind actually prepare it.

Last week I made a salad that we hadn't had in years.  What made me think of it, I have no idea.

What was it I hear someone ask?
My version of Caesar salad - 
lettuce, snipped chives, anchovy fillets,
 blue cheese crumbles, avo slices,
 1/4 hard boiled eggs and finally...
Caesar salad :)

For those who have never had one it is a salad which consists of lettuce, anchovies and thinly shaved cheese.  But, I made a twist to the recipe because I didn't have any parmesan to shave.

I rinsed, and shook dry homegrown lettuce leaves and garlic chives.  The leaves were broken into more-or-less bite / mouth sized pieces and the chives were snipped small-ish.

Add to that a couple of Tweedle Dee's eggs (before she got broody) which were hardboiled, peeled and cut into quarters.

Then, in place of shaved cheese, I had a chunk of Creamy Blue in the fridge (good for late night snacking on biscuits whilst watching TV :) )  So that got crumbled onto the leaves together with a sliced avo and 12 X anchovy fillets.  Finally, I made fried croutons out of a couple of slices of homemade bread.
... croutons were added before the salad was 
 sloshed  with the homemade dressing ... :)
The dressing was made using :

1 X tablespoon of the oil from the anchovies
4 X tablespoons of olive oil
1/3 - 1/2 teaspoon of prepared (English) mustard
1 X teaspoon of Worcestershire Sauce
2 X overflowing tablespoons of freshly squeezed, homegrown lemon juice and
2 X tablespoons of plain yoghurt
scattering of dried garlic flakes
salt & pepper (to taste)

They were all whisked together and poured over the salad.

Surprisingly filling, definitely yummy - to the point that RMan even wiped the last of the croutons by dipping them in the leftover dressing - he calls that "knubbering" (snacking on something yummy).

Nothing nicer that completely empty plates, and no a single leftover in the fridge :)

And, apart from the creamy blue, the anchovies and the avo - all the other ingredients were home grown / provided :)

Then, on Saturday, Tweedle Dee's eggs to the rescue again.
Creamed spinach filled omelette
Omelettes filled with creamed spinach, grated cheese and tinned tuna for RMan, and leftover homegrown creamed spinach and grated cheese for me.

Served with a couple of slices of homemade bread.

Not 100% self-sufficient, but good enough for me :)

Saturday, 9 May 2015

Still baking...

The banana bread recipe that came with my Ma Baker bread machine was a disaster.

Although in the true sense of the word banana bread isn't "bread", but is actually a banana cake, which is baked in a loaf pan.  Which is probably where it gets it's name from...
The banana bread recipe from
my Ma Baker information / recipe
booklet
But, was the disastrous recipe the machine's fault or mine?  I dunno.
Dense and heavy - more like bread than cake
Nowhere in the recipe does it say anything about removing the mixing paddle.  But, although it needs initial mixing to combine the ingredients, it wouldn't need the paddle later in the recipe because the recipe doesn't contain any yeast.  So, hesitating, I left it in.

The result.

It was heavy, dense and stodgy - although it did taste like banana bread I wasn't happy.

So I went searching for a bread machine banana bread recipe, and found one here or at the end of this posting.
My second attempt - light, aerated, and definitely
banana bread - or should that be cake? lol
The changes I made to the recipe was to prep everything before placing the already mixed wet and dry ingredients into the baking pan - and I omitted the paddle.  And I used the "Bake" cycle, not the "Quick" one - which included mixing at the oddest times during the baking process.

Ah - that's more like it.
You can visibly see the difference between the
two recipes and resulting loaves.  The booklet
recipe loaf is on the right, and the new recipe is
on the left.
This was definitely banana bread as I know it.
660 watts - that means the Ma Baker, on
bake cycle, uses only 448 watts
(by deduction)
With the fridge (132 watts) the decoder, wi-fi and laptop (+/- 35 + 10 + 35 watts respectively) and the bread machine all working simultaneously, the Owl electricity monitor was displaying 660 watts.  Which means that the bread machine was only using 448 watts.  Now, can one possibly bake a cake with less power? ;)

My final question:  those that have, and use, bread a machine - do you use it for anything other than baking bread / cakes?  If so, would you care to share?


Ingredients  Serves: 10 

·        2 1/4 cups (280g) plain flour
·        1 teaspoon baking powder
·        1/2 teaspoon bicarb soda
·        2/3 cup (150g) caster sugar
·        2 tablespoons (40ml) vegetable oil
·        2 eggs
·        2 bananas, peeled and halved lengthwise

Directions
Preparation:10min  ›  Cook:50min  ›  Ready in:1hour 

1.      Place ingredients in the pan of the bread machine.
2.      Select the 'Dough' setting, and press 'Start'. Mix the bread for 3 to 5 minutes until the bananas are mashed and all ingredients are thoroughly combined. If necessary, use a rubber spatula to push the dough from the sides of the bread pan. When 3 to 5 minutes have passed on the clock display, press Stop. Do not continue mixing.  I sifted at the dry ingredients together, beat the eggs gently, mashed the banana and, mixing those two together, added the oil.  The wet mixture was then carefully added to the dry ingredients and the mixture was placed in the Ma Baker - sans the paddle.

Then I continued as the recipe states:

3.      Smooth out the top of the loaf with the rubber spatula.
4.      Select the 'Bake' setting, and press 'Start'. The 'Bake' cycle time may vary with machines, but should be about 50 minutes. To test the bread for doneness, insert a wooden skewer into the centre top. Remove the stick. If the bread is done, the stick will come out clean. If there is dough on the stick, reset the machine on Bake and continue to bake an additional 10 to 15 minutes. Test again to assure the bread is completely baked.
5.      Remove the pan from the machine, but allow the bread to remain in the pan for 10 minutes. Remove the bread to cool completely on a wire rack. 

Saturday, 25 April 2015

Customer service

Given our solar power set-up I always establish the power consumption of any electrical appliance before it enters this house.  If I am unable to obtain this information from the manufacturer, or their accredited agent / distributor, then they don't get a sale.  And, trust me, too frigging many manufacturers can't / can't be bothered / won't give me any answers...!

So - I have been on the hunt for an electric bread maker.  My solar oven is great in summer, but is not that reliably usable in winter. The Rosie - we don't have it on every day during the winter months - only the days that warrant it.  Which means that I have to buy bread from the shop.

Every electric bread maker I found on-line didn't have any detailed info on the power consumption of the item.  Frustration!!   When will manufactures learn that consumers are more aware and need to be given such pertinent information, especially as more and more people move either off-grid, or who move from the land to the towns and become grid connected (having to budget for their power use) and who will make greater demands on the power providers??

On our last trip to the co-op in Swellendam, I went looking in their kitchen appliance section, and came across two bread makers - a Russel Hobbs model, and a Mellerware one.

The Russel Hobbs, at 1200 watts was too power hungry for our solar system, but the Mellerware at 610 watts was more promising.  However, their recipes state that the average cooking time for a loaf of bread is 3 hours.
Ma Baker Bread Maker II
610 watts for 3 hours = 1830 watts?  Nope, no usable with our system.

Or is it?

I know that mixing, proving and baking all require different human effort / heat.  Therefore, mixing and baking can't use the same amount of watts.  Similarly, nor can proving and baking...

I took a phone pic of the contact info of the bread maker's distributor, and, when we got home, I sent them the following e-mail:

From: Dani
Sent: 14 April 2015 05:19 PM
To: Creative Reception
Subject: Bread maker

Good day

I am interested in purchasing the Mellerware 26500B bread making machine.  However, we live off grid, and have only so much power, I was wondering if you could tell me how many watts in total the machine uses to make a single loaf.  Obviously, mixing the dough, proving and baking will all use power, but how much per function?  And how long does the unit stay at maximum wattage for?

I would be grateful if you could answer these questions.
Kind regards


Dani

A few days later I got this reply:

Good day

I am sorry for the delay in response.

The results for the 26500B bread maker.

Cycle 1: 76.9W(Mixing Intermittently for 5 min)
Cycle 2: 86W(Constant mixing for 5 min)
Cycle 3: Off(1W for 20 min)
Cycle 4: 86W(Constant mixing for 15 min)
Cycle 5: Off(1W for 80 min, proving)
Cycle 6: 610W baking for 55 min


Kind Regards Beverley      |  Customer Care

 021 931 8117
 021 931 4058


 service2@creativehousewares.co.za
 20 Tekstiel Road, Parow, 7493, South Africa
Service Center Share Call: 086 111 5006

Now - that is what I call customers service.  For their trouble they are rewarded with a sale - the unit was ordered this last Thursday and I should receive it next week.

Well done Creative Housewares!!  You understand that if your staff are equipped with the knowledge of the product you are selling (or they know who to turn to in order to obtain such answers), and are thus able to provide answers to any prospective clients questions, then you are in a far more favourable position to successfully sell your wares.

Using the locally grown and produced stone ground Eureka Mills flour, this is one more item which will enable us to be more self-sufficient (or should that be self-reliant lol), which will free up my fridge space (I keep my weeks supply of shop bought bread in the fridge to prolong it's life), and finally, commercially produced "fresh" <sic> bread is something which I will no longer have to purchase during the winter months... :)

Given my dang tennis elbow, I am also going to get the bread to proving stage in the bread maker, and then bake it in my solar oven and Rosie - when it is lit :)

Win Win :)


Disclaimer:  In writing this I received absolutely nothing from the aforementioned Creative Housewares except their wonderful customer service.  My motivation for writing this was to share Creative Housewares positive commitment to their customers.  I believe in giving credit where credit is due.